
Live! is a digital audio workstation (DAW) made by Ableton that changed the life of a lot of musicians with its unique workflow. Compared to other softwares as Logic, Cubase, Sonar, Audition or whatever you use, Live! offers to its users, in addition to the classic workflow, the capability to organize the song as a “sequence of scenes”.

In this article I would like to discuss with you about this technique and give you a series of “tips and tricks” to start live jamming with your equipment and this beautiful piece of software. Since there are a lot of things to say and a lot to take a look at, let’s proceed step by step.
The picture above shows the view of Ableton Live! that offers this approach and that’s the one which we want to focus our attention on: the session view. In the session view, the tempo flows vertically, the tracks flow from left to right and each one of them is organized in a series of clips, from top to bottom. Each row of clips is a scene. Each clip is a small fragment of audio data or midi data. You can play, record, stop or reverse each clip “on the fly” or choose to act on an entire scene, that is, let’s repeat, the sum of the clips in all the tracks at a given point in time.
This view is particulary suitable for live shows, because a musician could pre record some clips and launch them in real time during his live show, as he likes. Launching one or more clips or one or more scene is nothing more that what usually do a disk jockey who uses this software for his live shows……and it’s fun, ok…..BUT….it’s not what we call a live jam.
Why? Simply because live jamming (or live looping), from our point of view, requires the ability to capture clips on the fly, launch them and jam with them, combining what a DJ usually does with what a musician usually performs.
First of all, the most important thing to consider when performing a live jam is the tempo of the song. You’re in a live situation and:
- Setting the tempo is the crucial part of your live show: each clip has to run in sync with the tempo of the live set;
- You don’t have time to operate in front of your PC with the mouse or the keyboard;
- You can’t set the metronome and play it. People who are listening to you won’t be happy, do you agree with me?
So how can we do, from scratch, to start jamming at a given tempo? Looper is the answer to our pains.
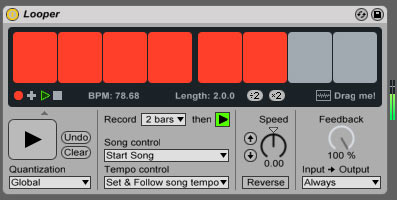
It’s a component, embedded inside Ableton Live!, that you can add as an fx plugin to each track you have in your song. It performs the following:
- Captures an audio clip and plays it in loop;
- Offers the possibility to overdub;
- Sets the tempo of the song according to the “start recording” and to the “stop recording” commands;
It has a lot of features in addiction to the ones above but, for now, let’s focus on this few ones. I suggest to take a look at the manual of Live! or, if you prefer, to this tutorial for more details about Looper. After you have set the tempo and started your song with the first loop launched, you can then capture directly the clips of your tracks and jam with them. It seems simple, but the whole process requires some practice before being able to create an entire song that could be defined “music”, especially if you suffer of the “rec enabled syndrome”, eh eh eh.
But let me give you some other “tips & tricks” in order to rapidly improve your skill and choose the “right way”.
ORGANIZE THE LIVE SET(S) YOU WANT TO USE
I said that in a live jam nothing should be pre recorded. OK, but you have to configure at least one base live set in order to start capturing and playing as soon as the “concert” begins, do you agree?
In your live set you have to choose:
- The tracks you want to control and capture (only audio or both midi and audio?)
- The instruments (virtual, physical, both?)
- The effects…yes you could also control them in real time during your show
- Which track or tracks you want to use to start the live jam: these tracks will contain Looper, one instance per track.
Regarding the design process of your live set, I suggest you to start with few tracks and to carefully decide WHAT to control. Remember, the more tracks and effects you have, the less your attention will be focused on playing music. You’re a musician, you have to create music not to play buttons and move knobs. Furthermore the time you have isn’t your best friend in a live jam contest.
Furthermore, you can choose to have a unique live set that accompanies you during your entire show or to break your performance in different live sets. The first choice leads without a doubt to a more complex live set, the second one has the drawback of closing and opening different projects on Live!. It’s up to you, you have to decide based on your specific situation.
CHOOSE THE RIGHT CONTROLLER FOR YOUR LIVE SET(S)
Choosing the right controller is crucial for your success! Remember, the more you are able to not care of the controller and the setup, the more you focus your attention on the music you’re composing and to what you want to say to people who listen to you. Fortunately (or unfortunately, according to different point of views) you have a lot of choices, you only have to know them, try them (if it’s possible) and then make your decision. From our point of view, the optimum would be a list of devices that let you easily:
- Control the operations on the clips (record, launch, stop, erase etc.);
- Control the operations on the looper instances;
- Control volumes, effects and other devices.
For what concernes clips and scenes you have two main choices: hardware solutions vs software ones. Regarding hardware solutions, you have at least three control surfaces that are widely used and that we suggest to take a look at:
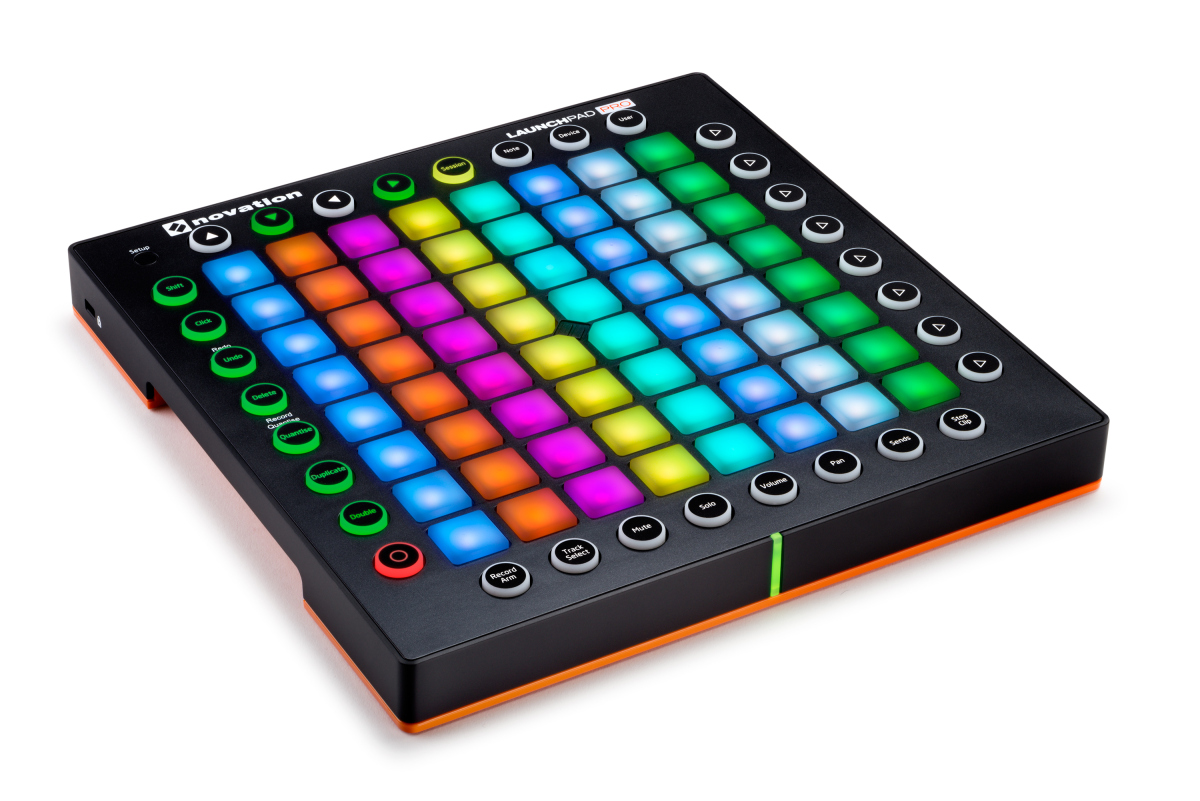
Maybe the most widely used surface. Available in three versions: Mini, S and Pro. You can find here all the informations you need.
APC serie from AKAI professional
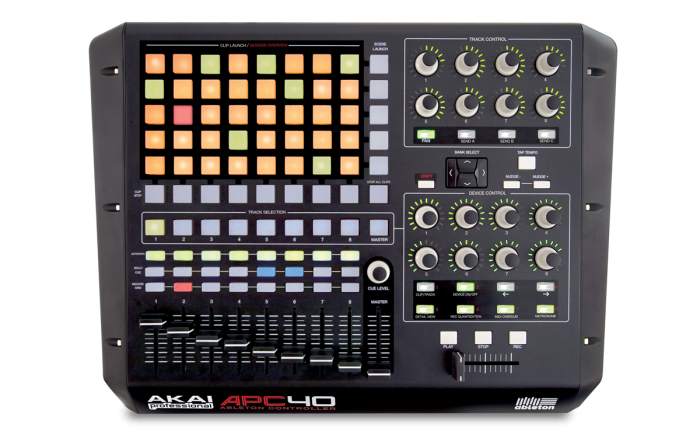
Five products from AKAI that meets different requirements. You can find here more informations.
PUSH by Ableton
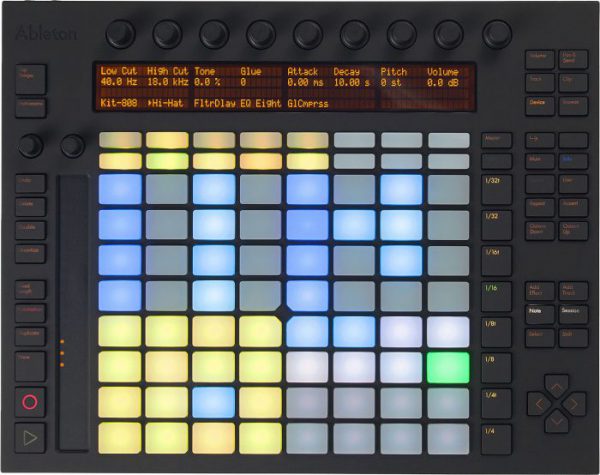
The most complete and complex controller on the market, made by Ableton itself. Take a look at this location.
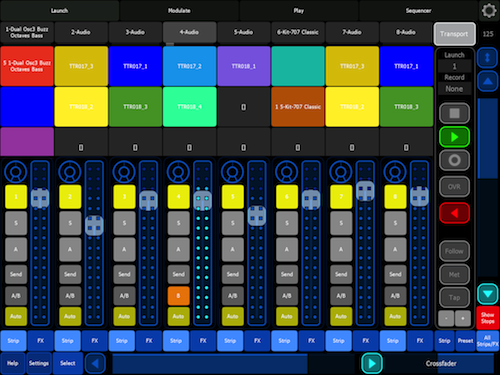
If you have an iPad, there are a lot of apps that let you perform the same tasks you can perform using an hardware controller, but at a lower price. It’s only a matter of how you feel with the touch screen of a tablet. Each app requires a software daemon running on your pc and some configurations on your copy of Live!
Here are some solutions you could consider.
Conductr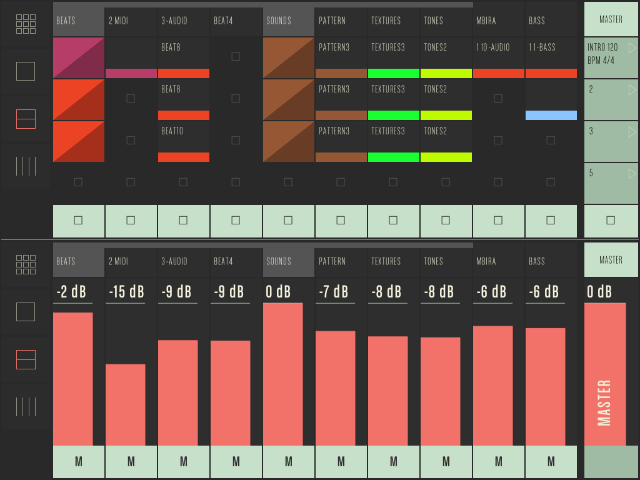
The simplest one, and it’s free of charge. You could start practicing with this. Here you can find more details.
Live Control 2
A control surface written for Liine Lemur. It can control almost everything of Live! but it requires you to buy Lemur app (24$) and, furthermore, that you install and run a small software daemon on your PC. Here you can find all the information you need.
Touch-able 3
Another classic, in my opinion the most stable and complete control surface for the iPad, made by Zerodebug. It costs the same price of Lemur but offers more features, even if by buying Lemur, you could design whatever control surface you want….so check what you need. Here you can find more informations. All these control surfaces, both hardware and software ones have a common issue: they don’t allow the musician to control Looper, because Ableton choosed an API (Application Programming Interface) for interacting with this plugin that does not permit all the tasks. The main problem with it is controlling it’s multi state button that starts the capture, the play and the overdub phases.
But, oh my Gosh, it’s the most important think that we need to do in order to perform live jams, so what?
There are multiple approaches to solve this issue, from the simplest one to the most complex one. Again, it’s up to you to make your choice, considering what you really need and how you feel with a particular solution. All the approaches share a common task to complete: the MIDI mapping of the buttons of Looper. In order to perform this, you have to click on the “midi” button on the top-right corner of Live!, click on the button to map and press the key you want to assign to that button.
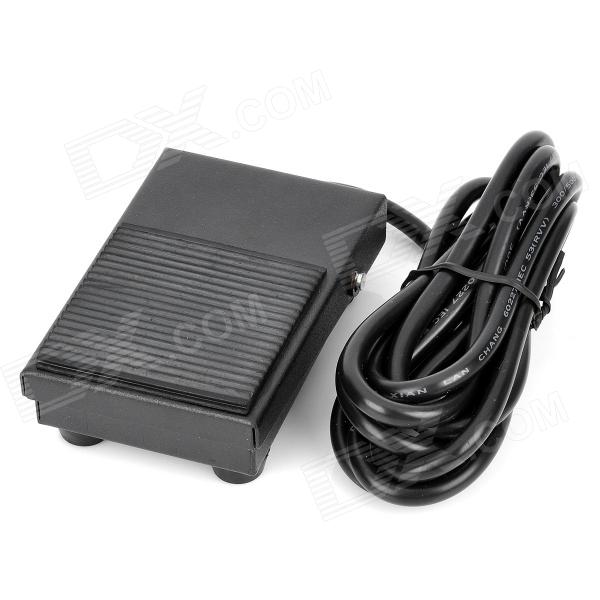
Yes, but WHAT to assign to the buttons of Looper? The simplest solution is to assign a key of your keyboard and choose a particular layout of keys based on the number of loopers instances you have in your live set. Another approach is to use a pedal connected to the midi controller you want to use to make your music. In this case you have to choose a switch pedal, of course.
Growing in complexity, again, if you have an iPad you could choose to design your own control surfaces using a programmable controller. Lemur and TouchOSC are two programmable controllers that permits the user to design his own control surfaces, for example. Also Touch-able 3 has got a customizable section in which to put your own buttons and sliders, even if it offers less possibilities than a fully programmable controller.
Once you have designed your control surface you can assign each button or slider or cursor inside it to the components of Looper or of Live! you want to control, in a very straightforward way.
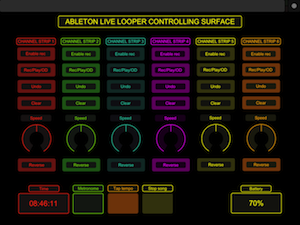
You can find some examples of control surfaces in the Downloads section. One of them is for TouchOSC:
The other one is a custom version of the very good control surface “Rheyne jammer”, for Lemur, that you can find on this website.
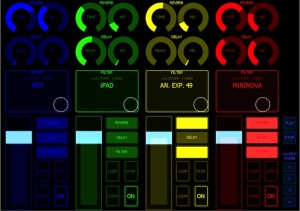
You can download them for free, if you own Lemur or TouchOSC of course. Let me say something more about this last solution: Rheyne (aka John Barbieri) is a very capable live looper, one of the most capable in my opinion. I suggest you to take a look at his Youtube channel, in which he loaded more of one hundred of live loops made with his setup and following the approach I described in this article. You have to take a look at this videos if you want to fully comprehend “how it works”. I suggest to take a deeper look at the video number 72, in which Rheyne explains his setup and his tips’n tricks.
Let me give you the last suggestion: start easy and grow step by step. Don’t add hundreds of tracks and components to control. Start with two or three tracks and practice in sending them in sync and jamming with them.
And have fun, this the most important think!!
Ciao.