
After our first discussion about programming a synth lead on the Novation’s baby, the Mininova, in this brand new appointment we’ll try to program a punchy synth bass taking advantage of the powerful and efficient synthesis engine of this machine.

Programming a synth bass is generally a quite straightforward process because the rules to follow are not too many, but I think one good rule to follow is “simple but with a lot of possibilities under the hood”. What does it mean? Well, it means that the timbre should be built using few sound sources but many modulation sources in order to let the musician variate the timbre “on the run” and give his execution much more character and fun.
In other words, a synth bass is quite different from an acoustic bass or electric bass so don’t try to hide the fact that it’s produced from a synthesis engine but use this last one to produce something that would not be possible instead. Obviously, don’t forget the kind of timbre you need for the music you’re playing/composing/recording so…always search for the right compromise.
So let’s start with our programming: DAW opened, Mininova AU editor loaded and we’re ready to go!
Oscillators
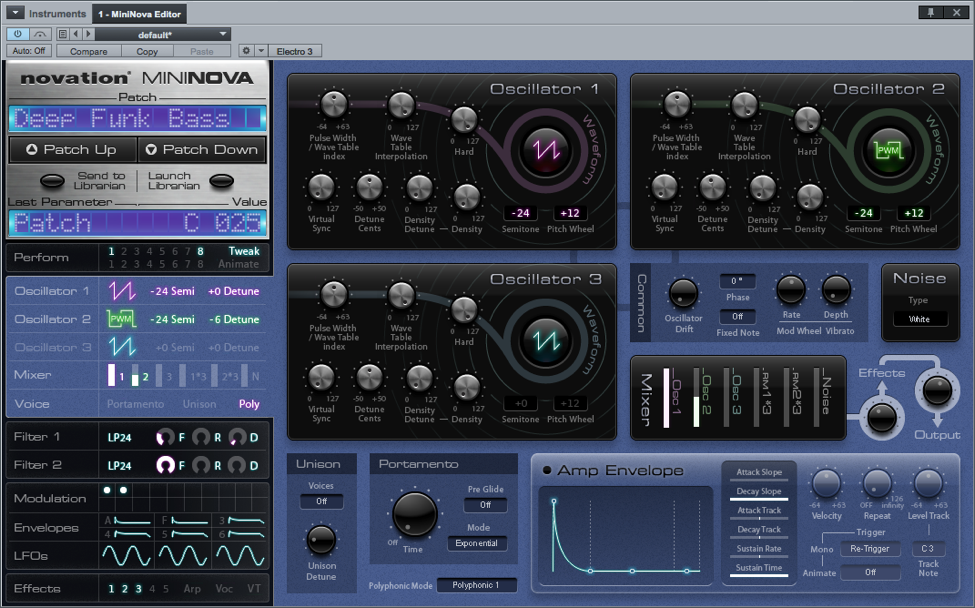
For a synth bass is often enough using only one oscillator, but you can choose to mix a second one to add more “character” to the timbre in case of need. Furthermore a sine wave or a triangle one is enough to obtain a simple bass timbre. In this example we choose to use two oscillator: the main one with a sawtooth waveform (in order to properly filter it according to the needs of the moment) and the second one at a lower volume with a PWM wave. Again, the sawtooth is a rich waveforms and it alone would suffice to realize our goal, but we’ve choose to program a “punchy” and “rich” synth bass so that’s why the choice.
Another “rule” to consider when programming a synth bass: a sawtooth waveform gives the timbre a “fat” character while a square wave gives the timbre a “rubbery” character. Choosing to add a second oscillator with a sine or a triangle wave one octave below enforces the timbre and adds more presence to it, but it’s not the only way.
Ah….I was forgetting to say that the oscillators need to be tuned two octaves below the “middle C”, because of the size of the keyboard of the Mininova.
The configuration of the oscillators alone however does not produce a synth bass. What gives the musician the “illusion” to play a bass is the amp anvelope without doubts: it has got to be SHORT!!
Fastest attack, fast decay, no sustain and fast release, generally equal to the decay but it’s not a rule of thumb (you could need a timbre that behaves differently when playing “legato” and when playing “staccato”, who knows?).
In our example we choose not to use the velocity to control the amplifier, but you could choose to use it in case you needed it of course.
Filters
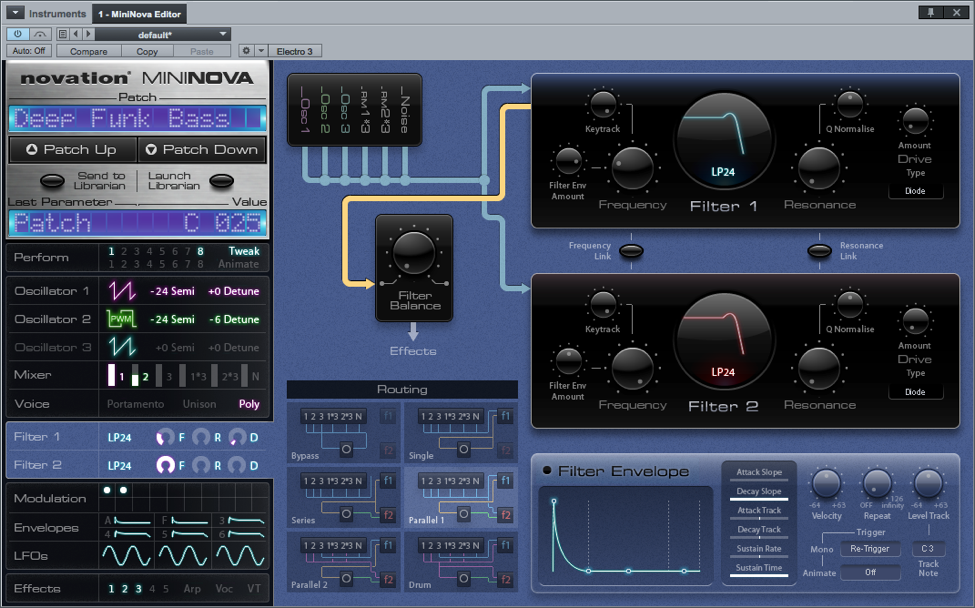
Generally a low pass filter is all we need to program a synth bass. In our example we choose a stronger LP24 filter type. The initial timbre is quite open so we needed to give a significative “cut” to the frequencies we let pass. We choose not to add resonance for now.
Also the filter envelope plays a strong role in our synth bass timbre, because if set to the same curve of the amp envelope (more or less) it can significantly improve the “punch” of the timbre. Obviously don’t forget to increase the “Env amount” knob to the right value.
Our basic timbre is quite ready….but now comes the fun!
Modulations

Now it’s time to make our decision: what of the timbre do we want to control and variate during our executions while playing?
In our case we choose to control:
- The filter frequency
- The filter resonance
- The filter decay
- The envelope amount for the filter
For the first three parameters we can use the default knobs on the interface of the instrument, for the last one we choose to assign the Tweak 1 slot to the parameter F1Env2 as shown in the above picture. In this way we could decide “at run time” how much the envelope controls the filter frequency and play with the decay of this envelope to make a fatter sound or a thinner and more percussive one. We don’t use any other “manual” modulation source for our timbre, but there’s still something to say regarding the modulation matrix.
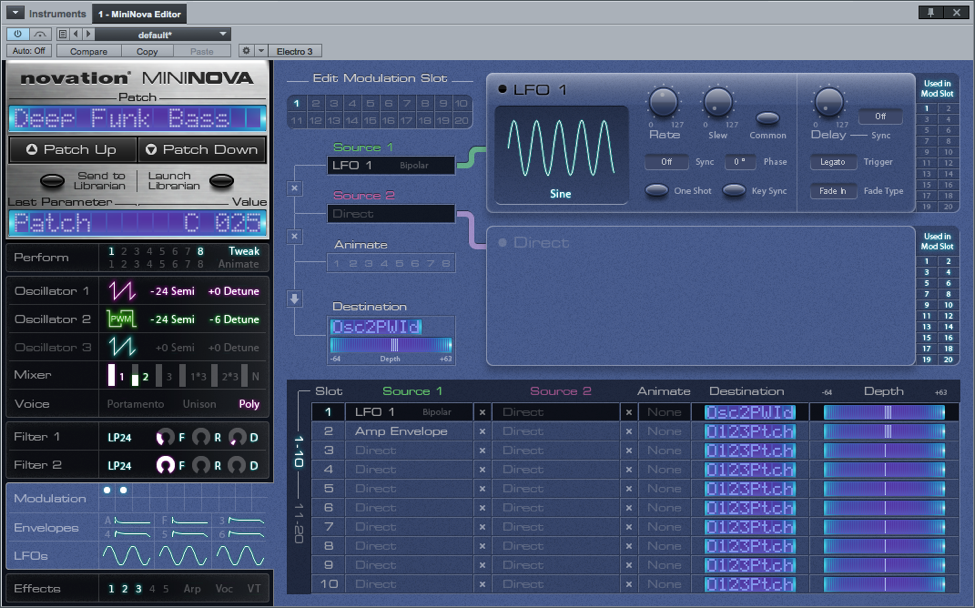
Having adopted a PWM wave for the second oscillator we choose to introduced a small amount of pulse witdh modulation using the LFO1 in order to make the sound more coloured and fat.
We also choose to modulate a bit the pitch of the oscillators using the amp envelope in order to add more punch to the timbre, it’s a common trick.
Effects
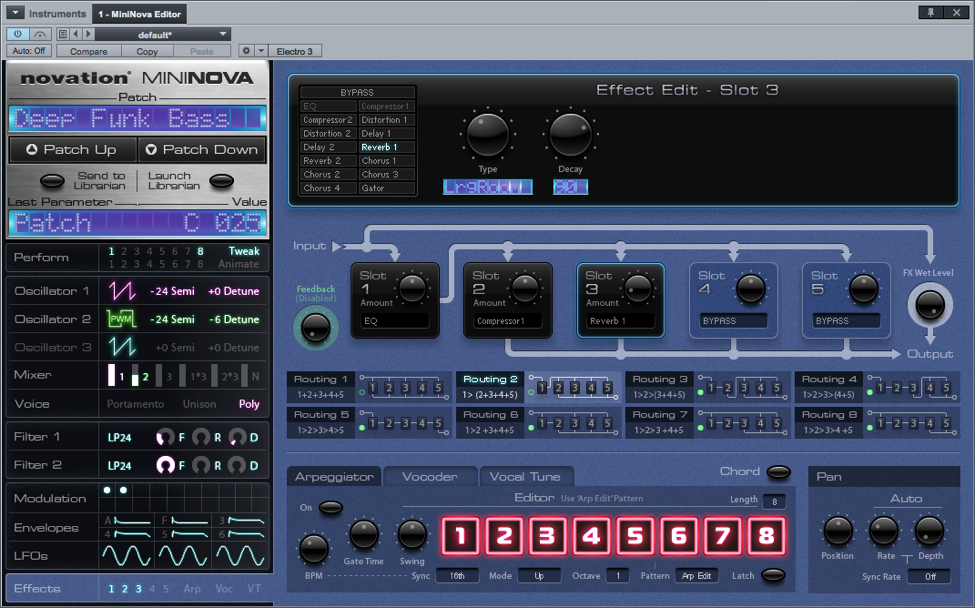
Last but not least, the effects. We inserted an EQ in order to lower the high frequencies a bit and to boost the lower ones. We added the Compressor1 in order…again…to add punch and presence to our timbre ad at least a little bit of ROOM reverb.
Woilà, shake and serve cold!
Check the audio demo and tell if you like it.
And, of course, stay tuned for the next appointment!
Ciao.